Okta single sign-on
Enabling Okta Single Sign-On (SSO) in SOS will replace the default login with Okta.
It is recommended to keep a window open to Okta and SOS simultaneously for this process.
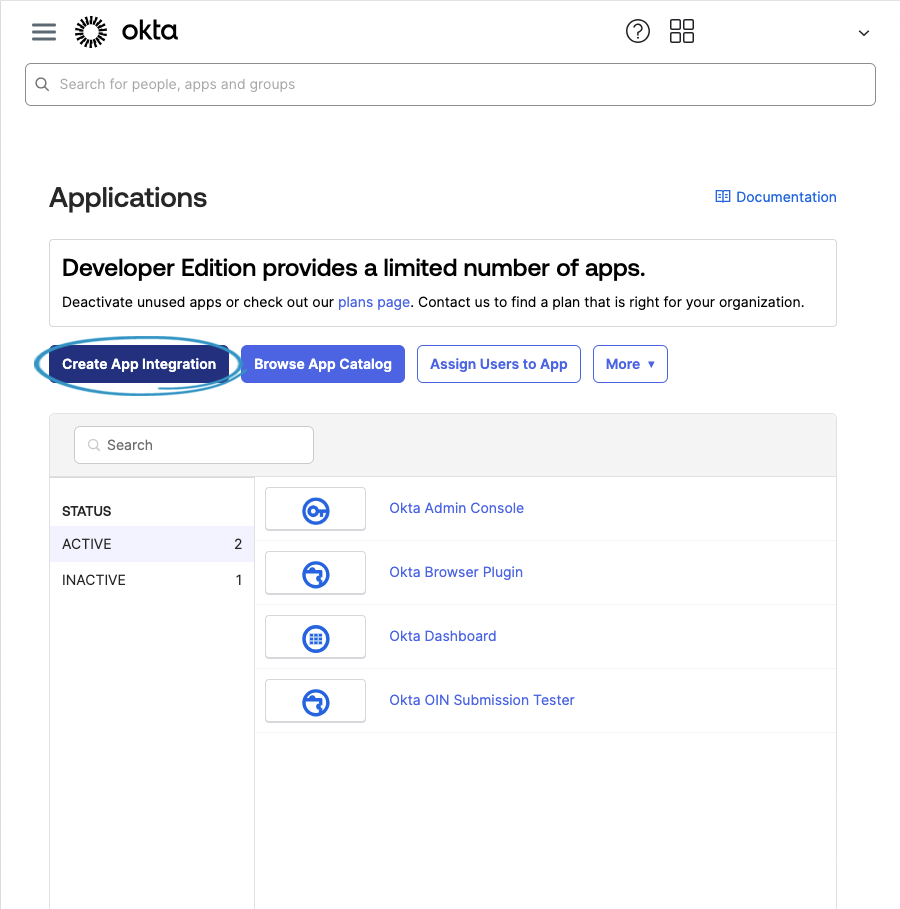
Login to your Okta domain. Under Applications, click Create App Integration.
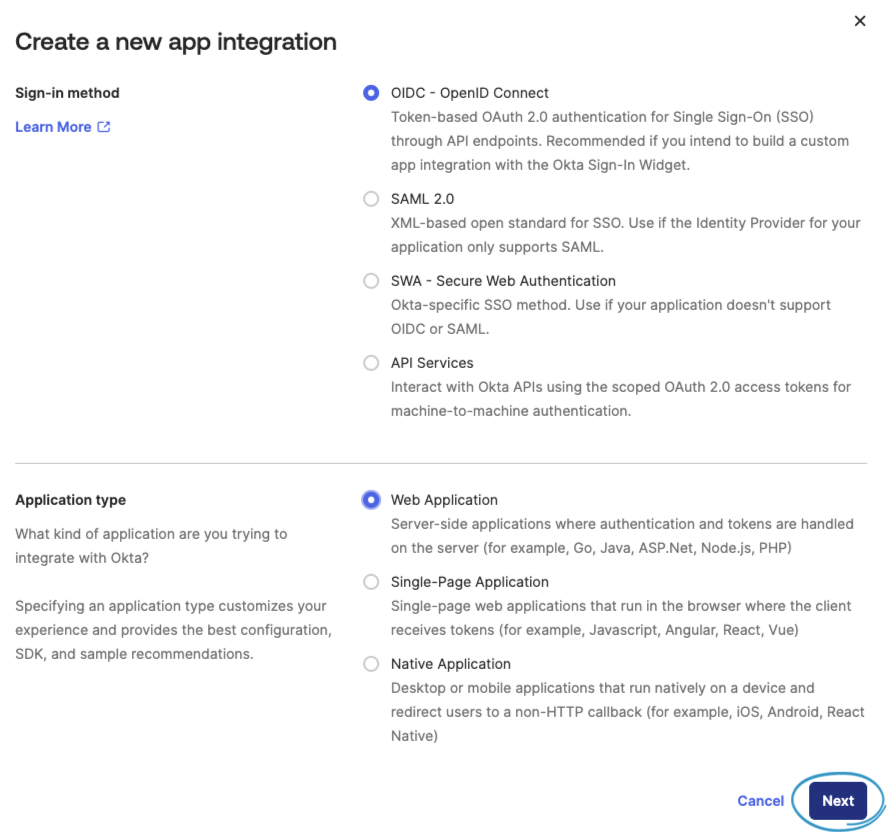
Choose OIDC - OpenID Connect then choose Web Application then click Next.
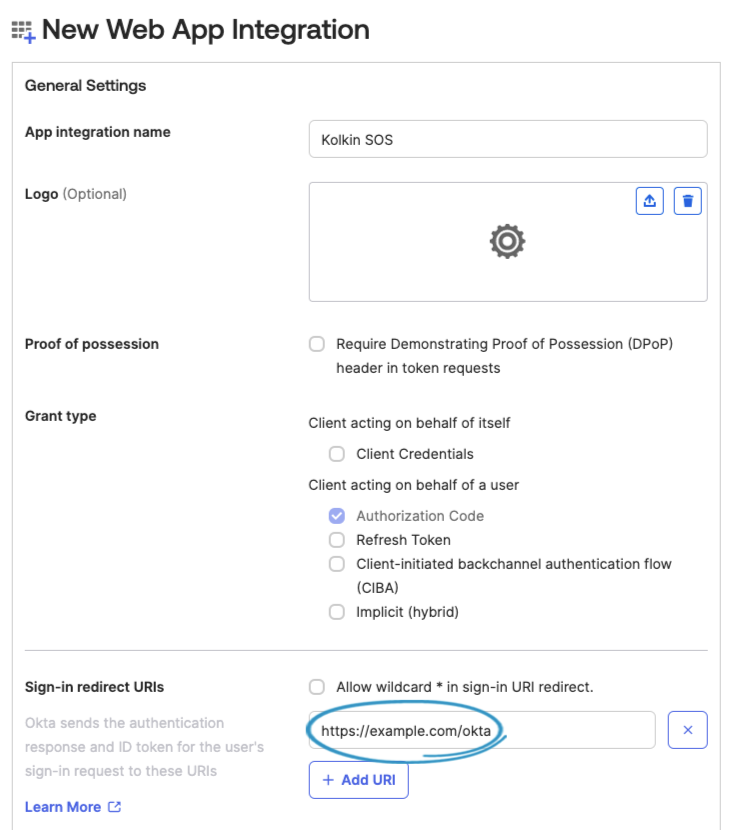
Name your App integration Kolkin SOS or use your own naming convention.
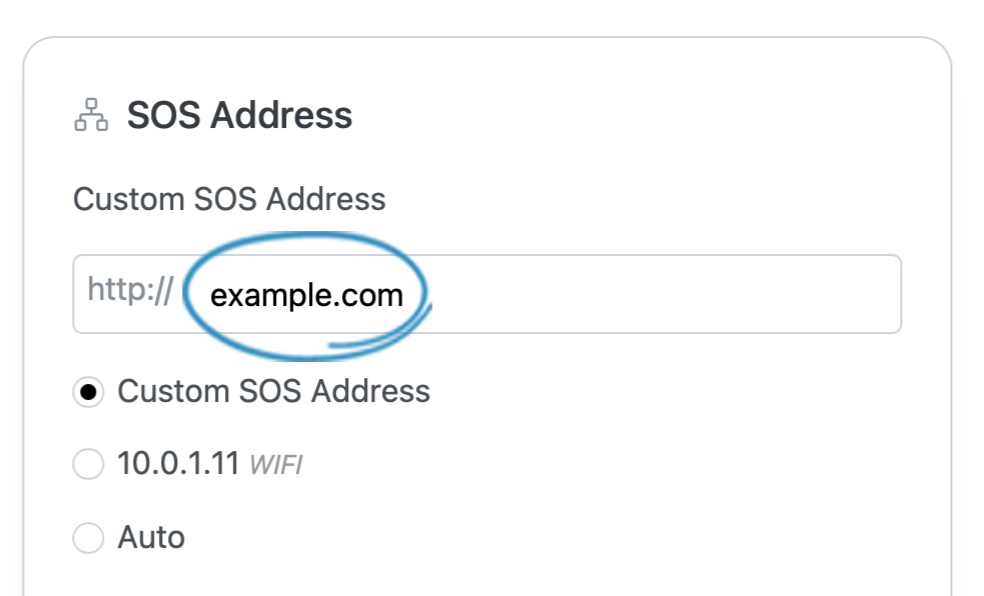
In SOS, go to System Settings > Network and find your SOS Address which should be a domain or IP Address.
In Okta, enter https:// + SOS Address + /okta into Sign-in redirect URIs.
Example: https://example.com/okta
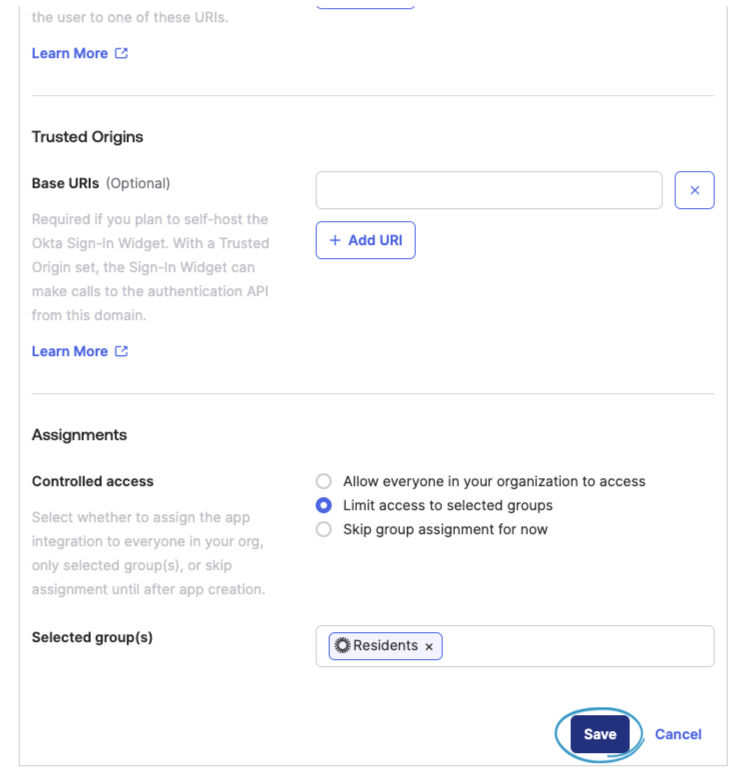
Scroll down to Assignments and choose your preferred user access control.
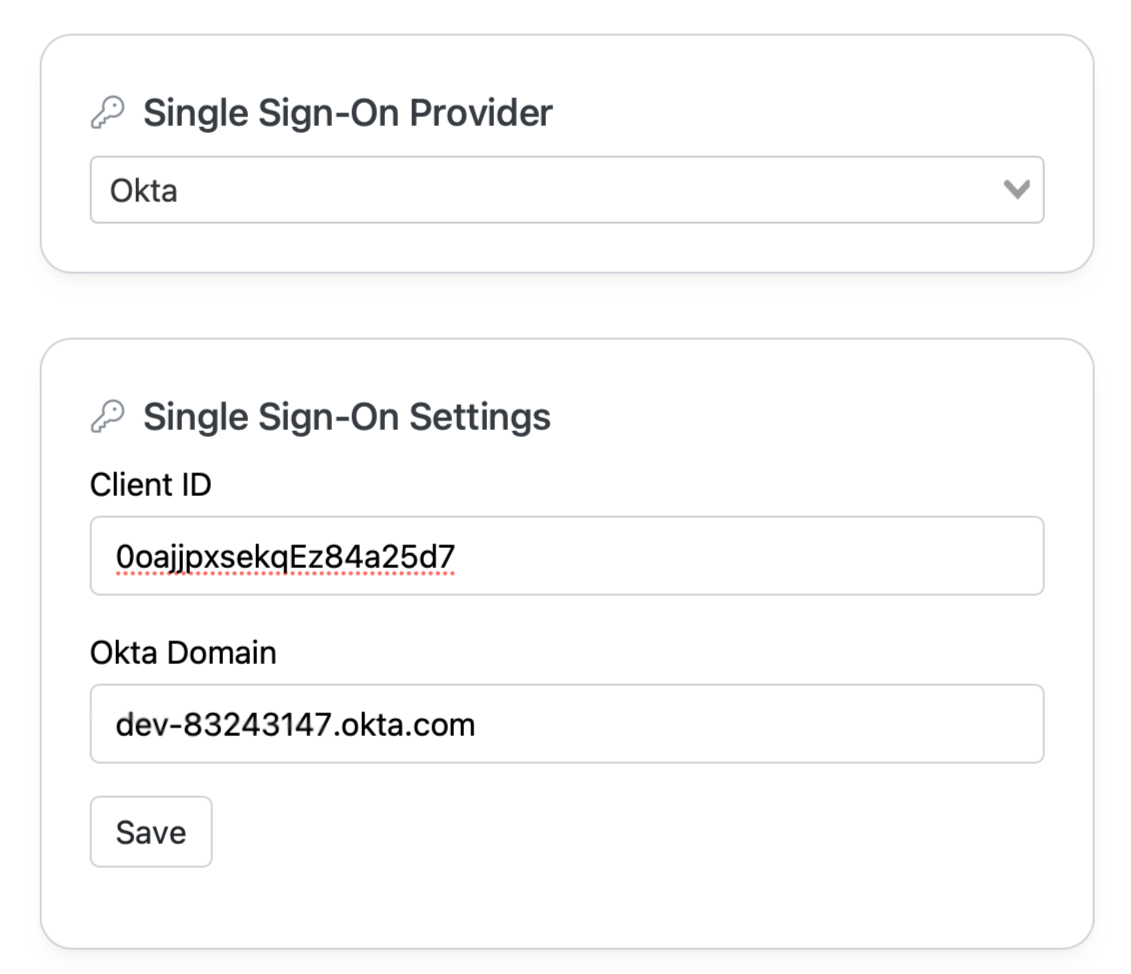
After saving, you should be taken to a screen which displays your Client ID for the application. Click Copy to clipboard.

- In SOS, go to
SOS Settings>SSO+EHRand choose Okta as your SSO Provider. - Paste your
Client ID&Okta Domaininto the fields in SOS then Save.
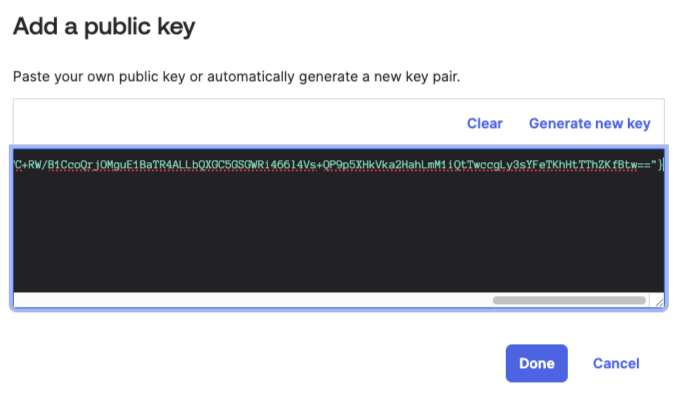
In SOS, generate a Public Key and copy the Public Key text.

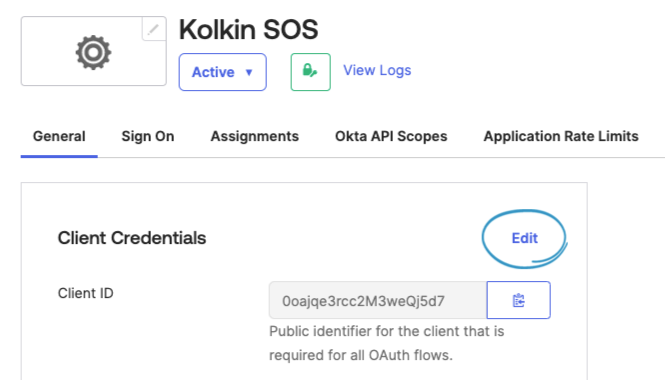
In Okta, Edit the Client Credentials for the "Kolkin SOS" application.
Change Client authentication to Public Key / Private Key then click the Add Key button.
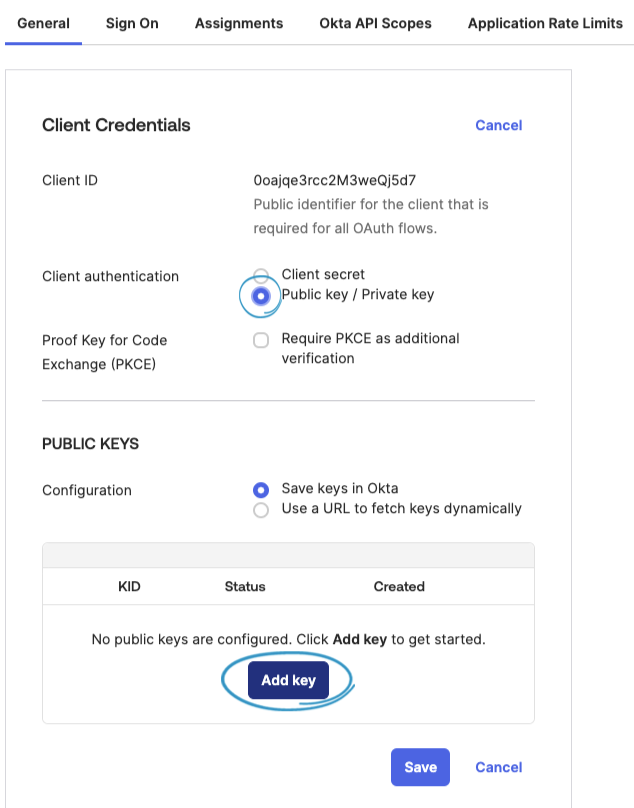
Paste the Public Key from SOS into the window and click Done.
Then Save your Okta Client Credentials.
After saving the Public Key, Okta is configured to authenticate users for SOS.
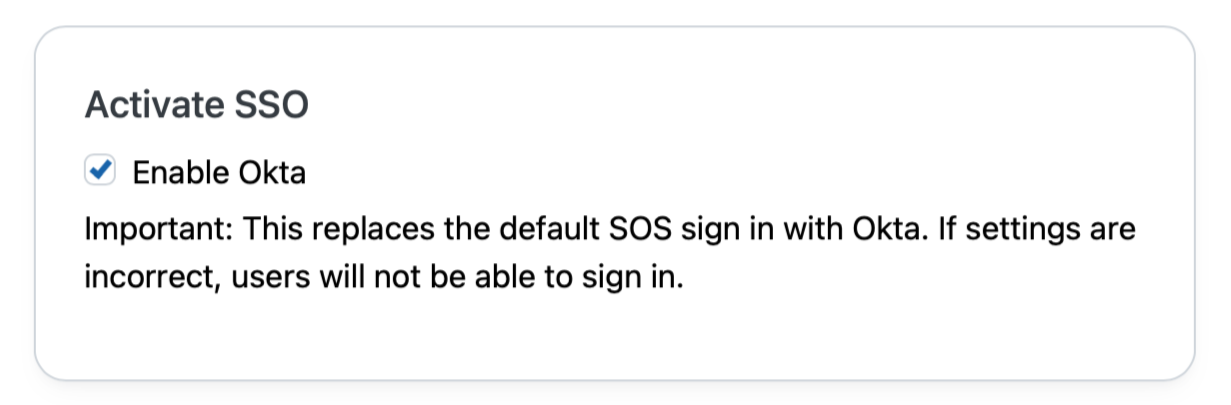
Go back to SOS and check the Enable Okta box under Activate SSO.
This will force users to sign-in with an approved Okta account.
Test your integration by going to your SOS Address. You should be redirected to Okta and either see a login screen or be auto-signed if you’re already logged into your approved Okta account.
Okta Single Sign-On Notes:
You can still reach the SOS sign-in page by going to /signin but only the Owner account can sign-in with a password. All other accounts need to sign-in with an approved Okta account.